# Bunny Stream
[Bunny Stream](https://bunny.net/?ref=y6dodu4tnk) is a premium service, it provides a better way to deliver online video with low cost and large bandwidth, to Configure the Bunny Stream, you will need to have a bunny account.
{% hint style="info" %}
Support us by registering for a Bunny Account through this affiliate link [https://bunny.net?ref=y6dodu4tnk](https://bunny.net/?ref=y6dodu4tnk)
{% endhint %}
1. [Add Library](#add-library)
2. [Set Up API Access Key](#api)
3. [Set Up Webhook](#set-up-webhook)
4. [Secure Video With Token Authentication](#token-authentication)
5. [Auto Import New Videos](#auto-import)
6. [Bulk Import Videos](#bulk-import)
7. [Enable Download](#enable-download)
8. [Enable AI Captions Generator](#ai-captions)
9. [Video Help Guides](#video-help-guides)
#### Add Library
***
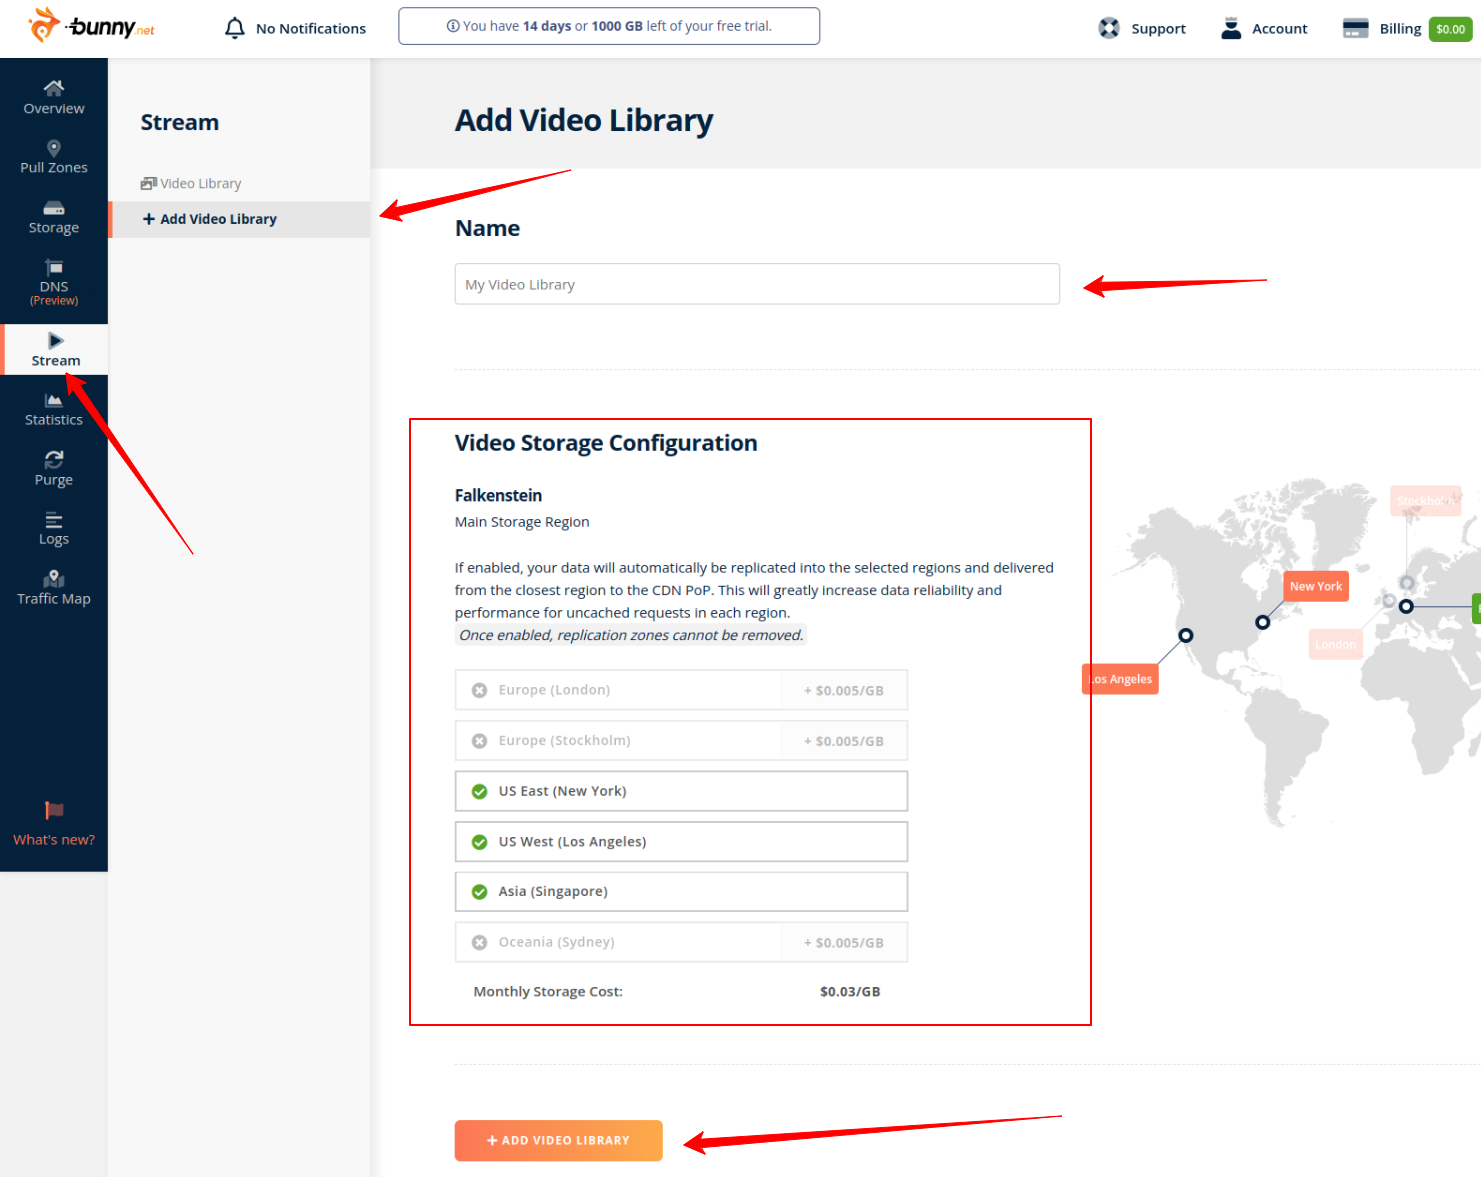
Navigate to **Stream > Add Video Library**, fill the name, choose **Storages** and click the **Add Video Library** button
***
#### Set Up API Access Key
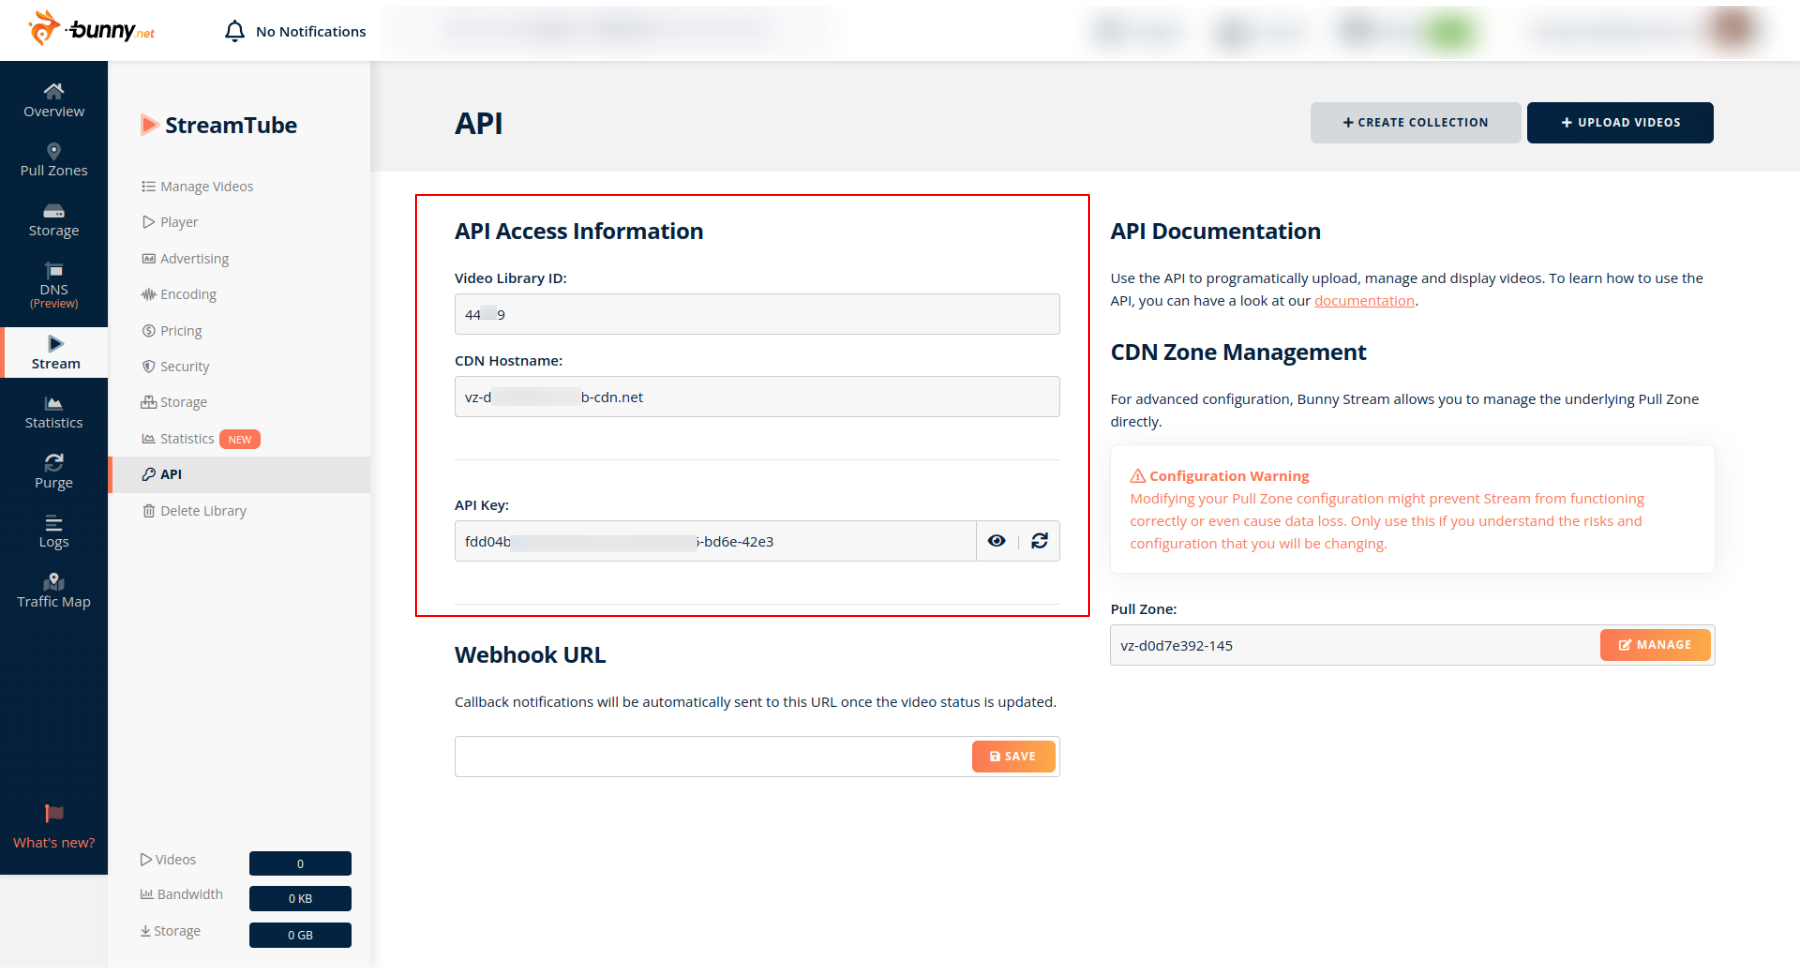
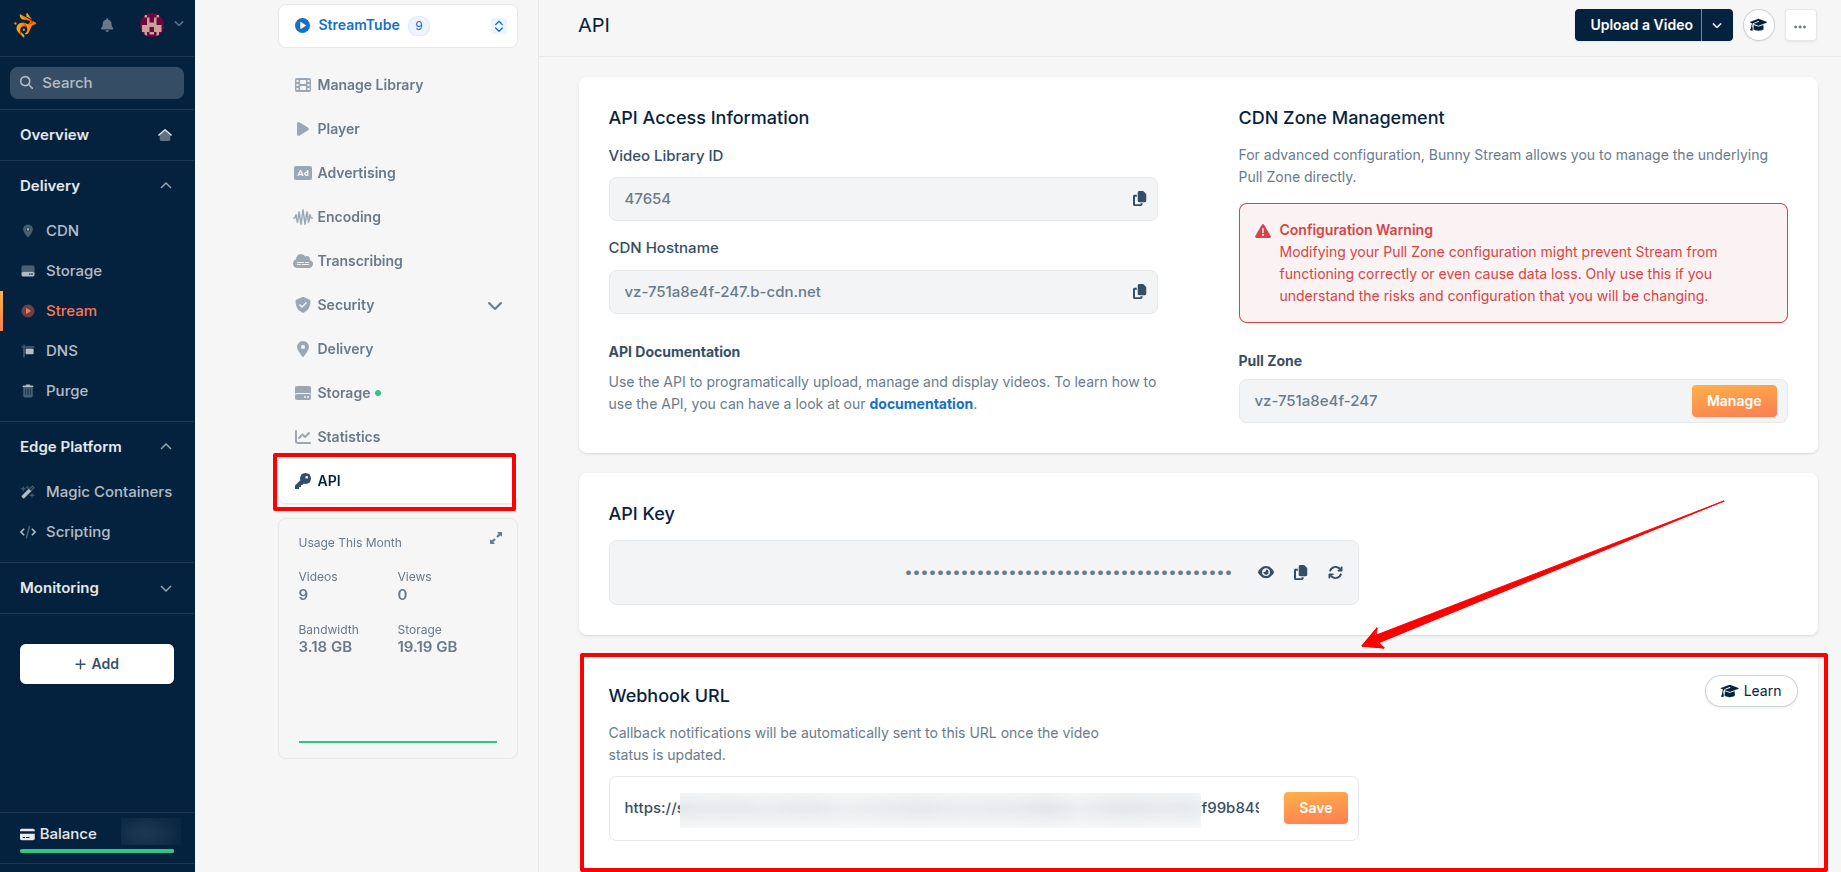
After adding Library successfully, click on the **Library > API** tab, copy the **Video Library ID**, **CDN Hostname** and **API Key**
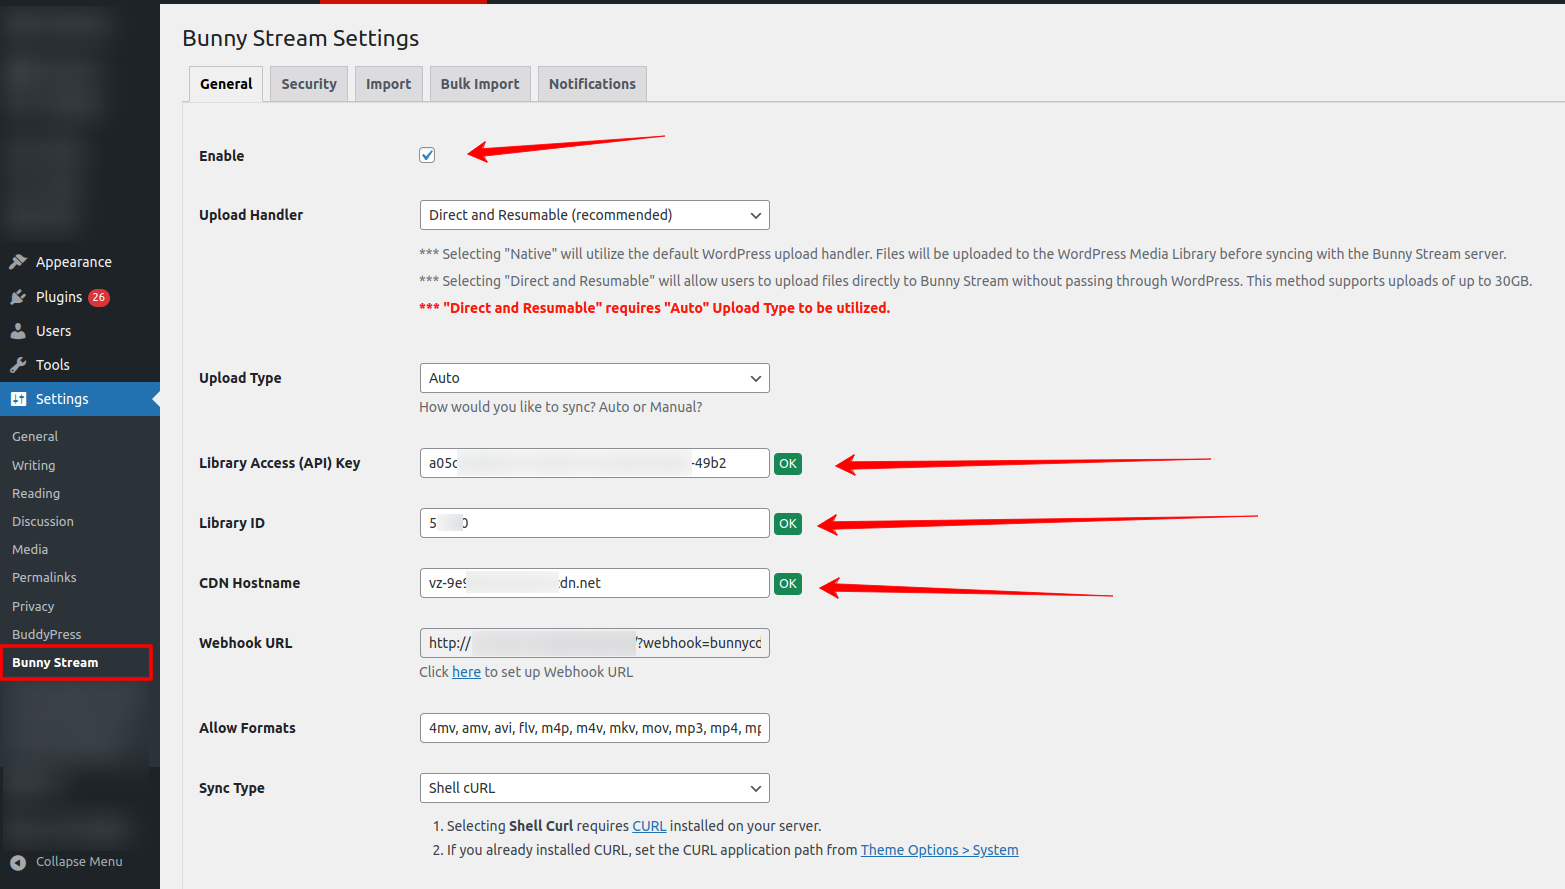
From WordPress backend, navigate to **Settings > Bunny Stream**, enter your the keys and click the **Save Changes** button, remember to check the **Enable** checkbox.
Bunny Stream Settings
{% hint style="success" %}
It’s strongly recommended to enable the "Direct and Resumable" handler along with the "Auto" upload type.
{% endhint %}
***
#### Set Up WebHook
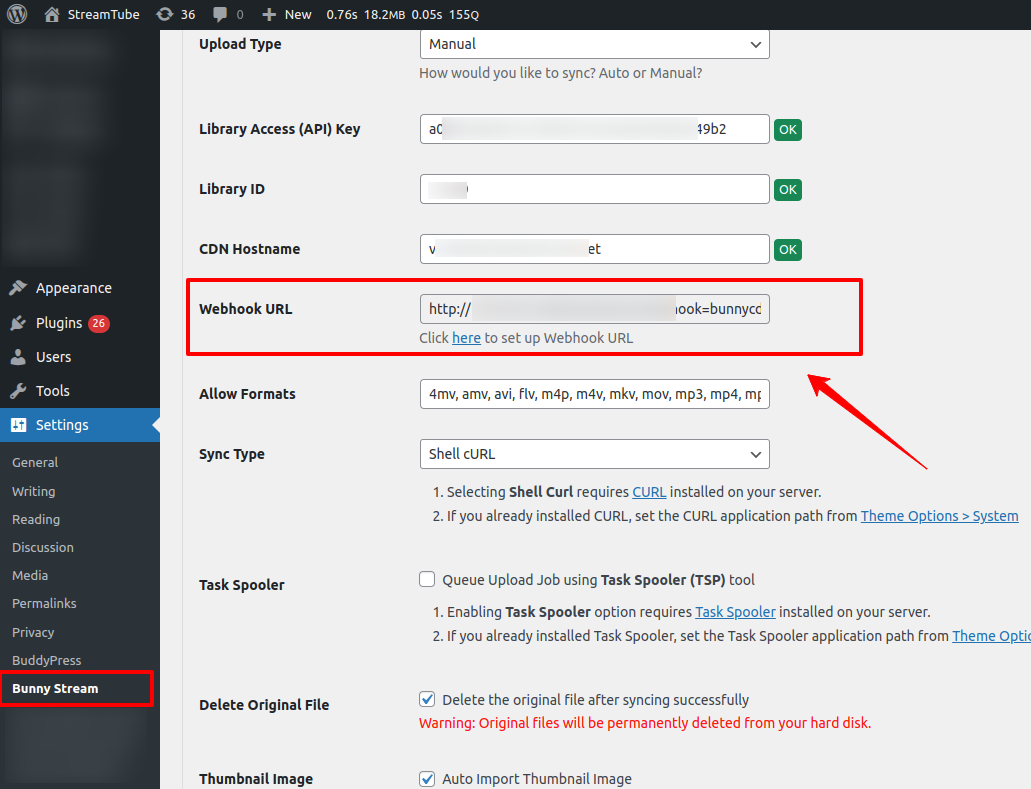
Navigate to **Settings > Bunny Stream** and copy your Webhook URL.
Copy Webhook URL
Go to the Bunny Stream's API tab, enter your Webhook URL, save changes.
{% hint style="warning" %}
The Webhook feature only works if your website is publicly accessible by Bunny Stream, which means it won't function on local or intranet environments.
{% endhint %}
{% hint style="warning" %}
IIf you change your host, domain, or move your website, be sure to verify the webhook URL, as it may have changed. Make sure the URL copied from your WordPress dashboard matches the one added in the Bunny API tab.
{% endhint %}
***
#### Secure Video With Token Authentication
Navigate to the Security tab, and enter your **Token Authentication Key** along with a custom expiration time
The **Token Authentication Key** can be found in your Library under the **Security** tab, Remember to enable the **Embed View Token Authentication** and **CDN Token Authentication** options, as shown in the screenshot below.

{% embed url="" %}
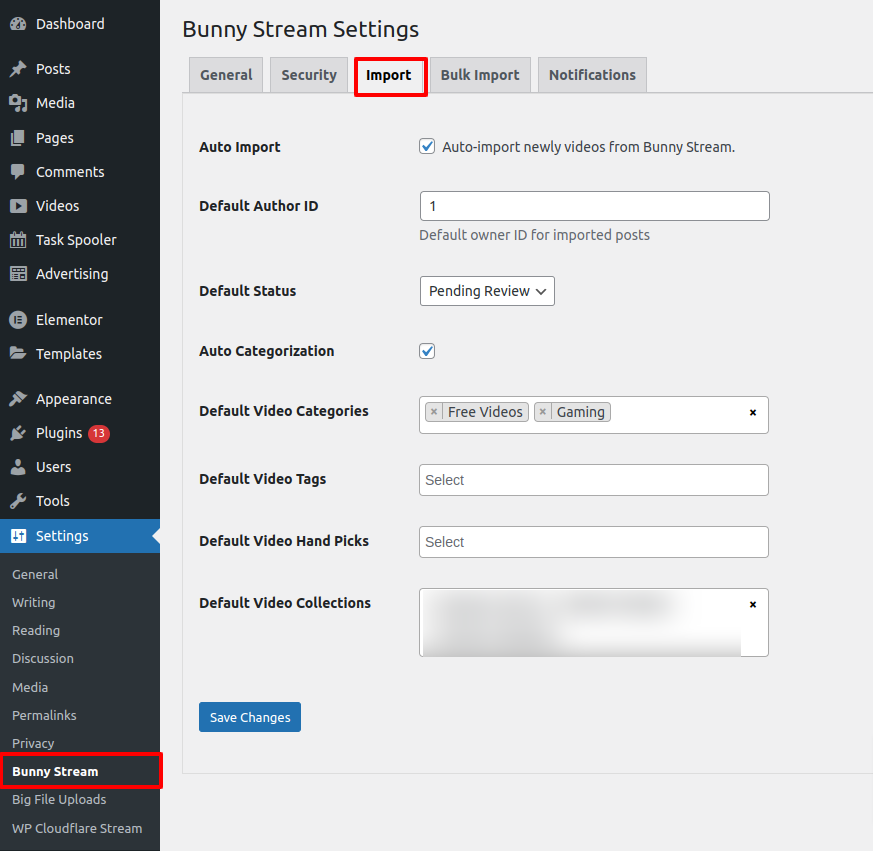
#### Auto Import New Videos
Enabling Auto-Import will automatically import new videos from Bunny Stream using Webhook without manual action. Navigate to the Import tab to configure the desired options.
{% embed url="" %}
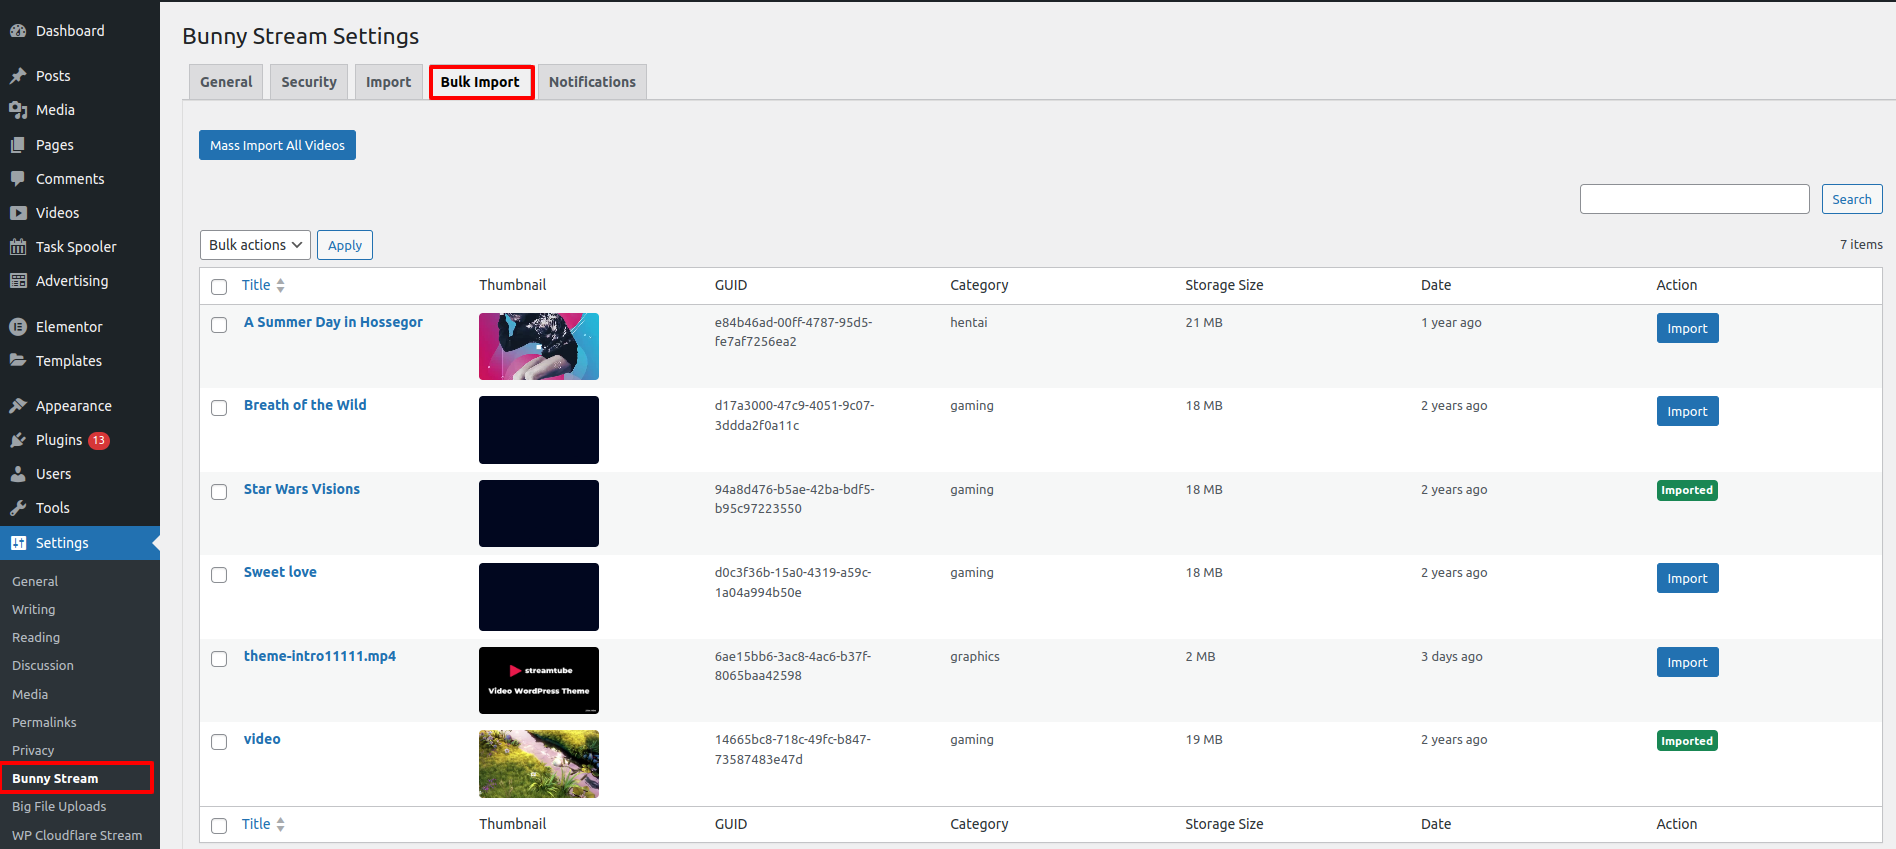
#### Bulk Import Videos
With this feature, you can bulk import all videos or specific ones from Bunny into your WordPress website.
{% embed url="" %}
#### Enable Download
***
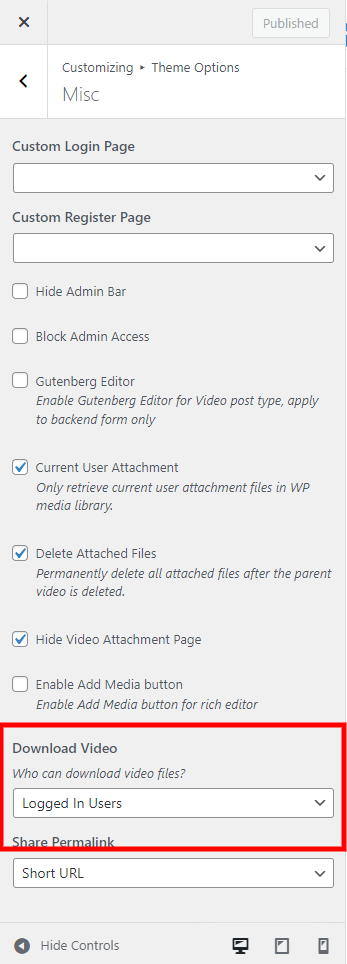
**Step 1**: To enable the Download feature, go to **Appearance > Customize > Theme Options > Misc**, In this section, turn on the Download button and choose whether to allow non-logged in users or only logged-in users to have the download permission.
Downloading Bunny video is only available if you utilize the Bunny AP
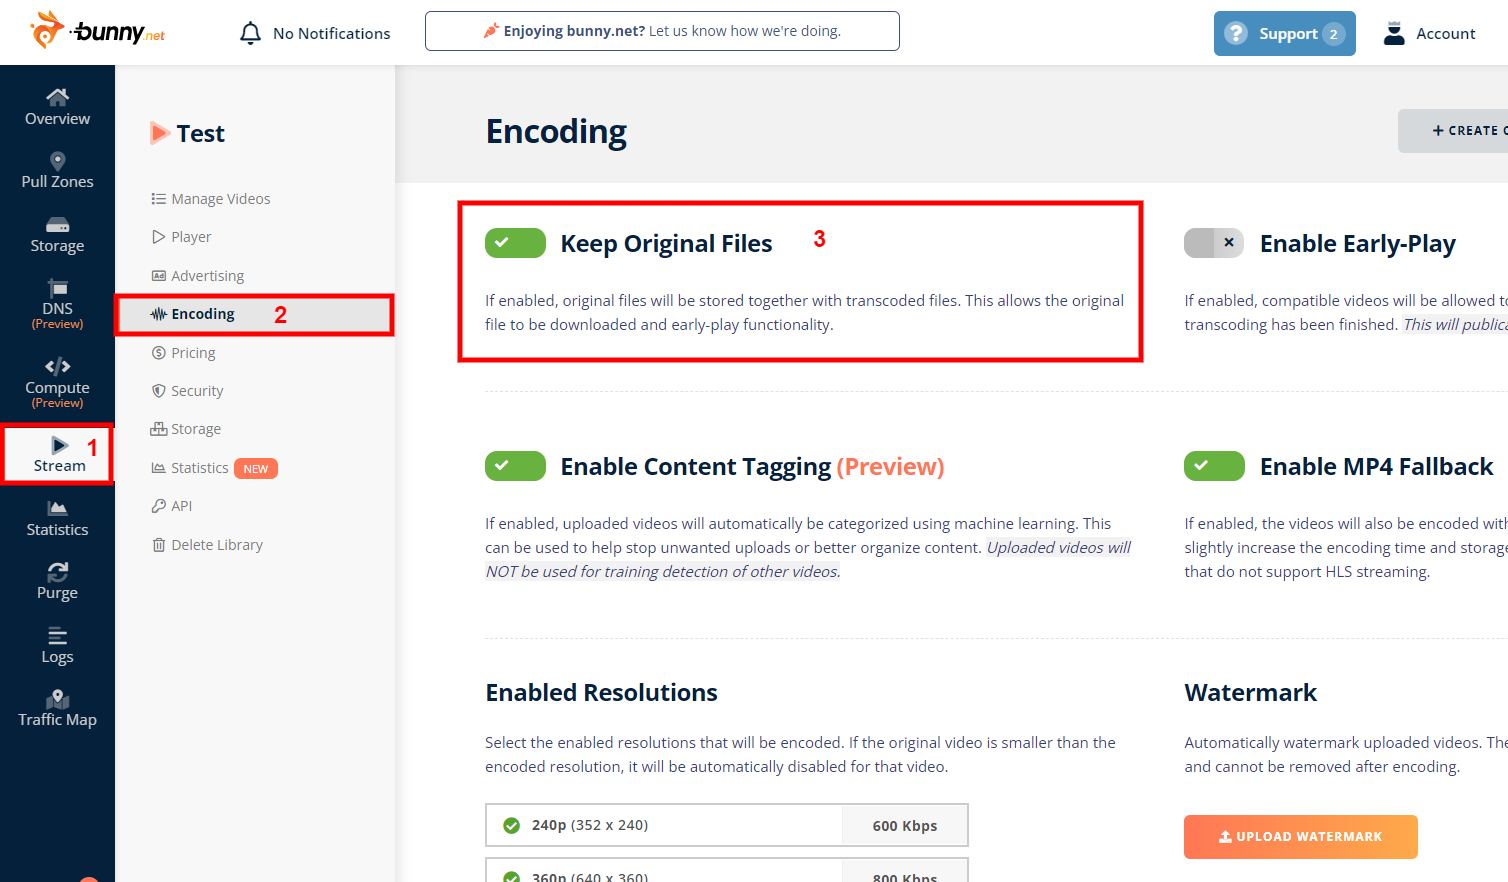
**Step 2**: Go to your Bunny **Dashboard > Stream** page, choose the **Library**, click the **Encoding** menu and enable the **Keep Original Files** option.
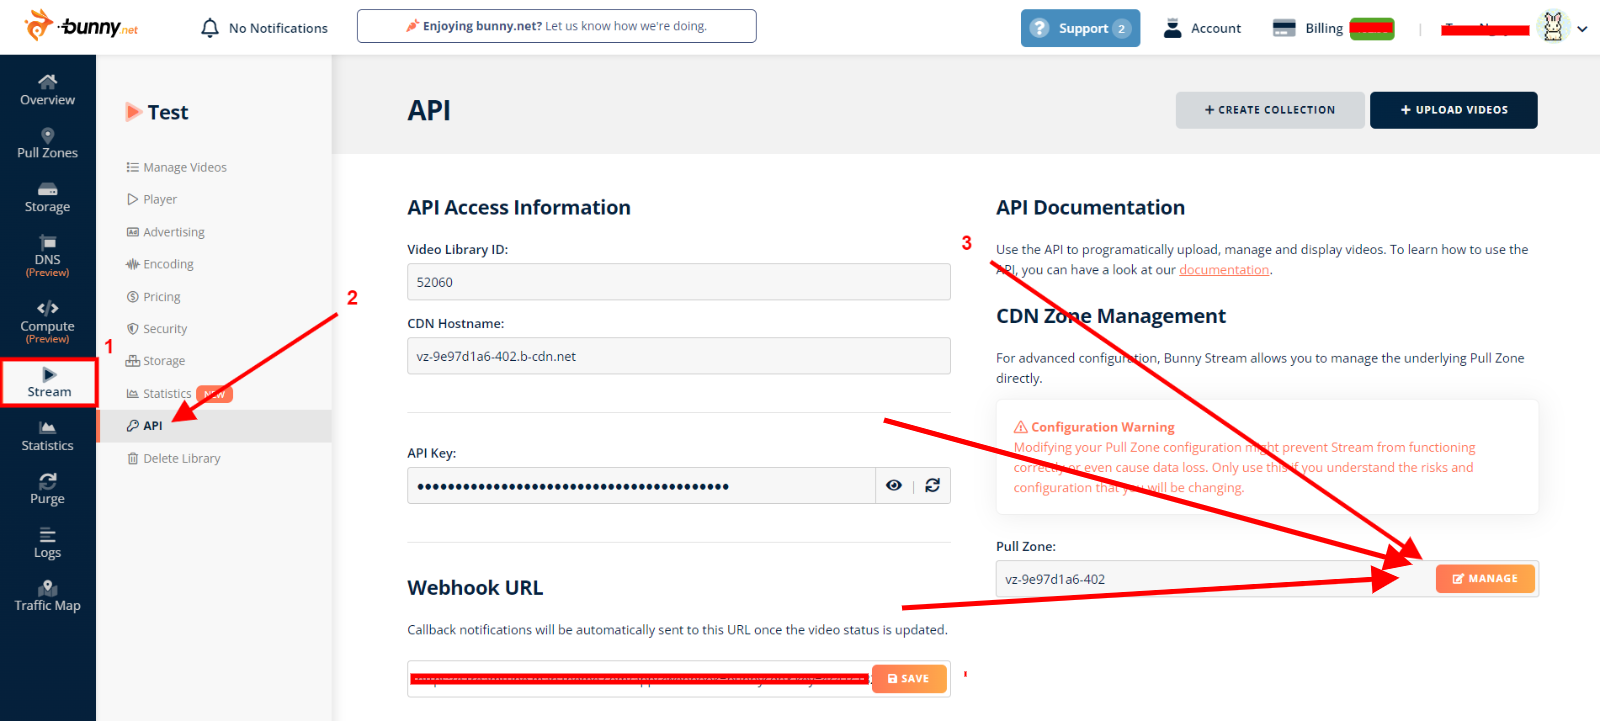
**Step 3**: Click the **API** menu and click the **MANAGE** button.
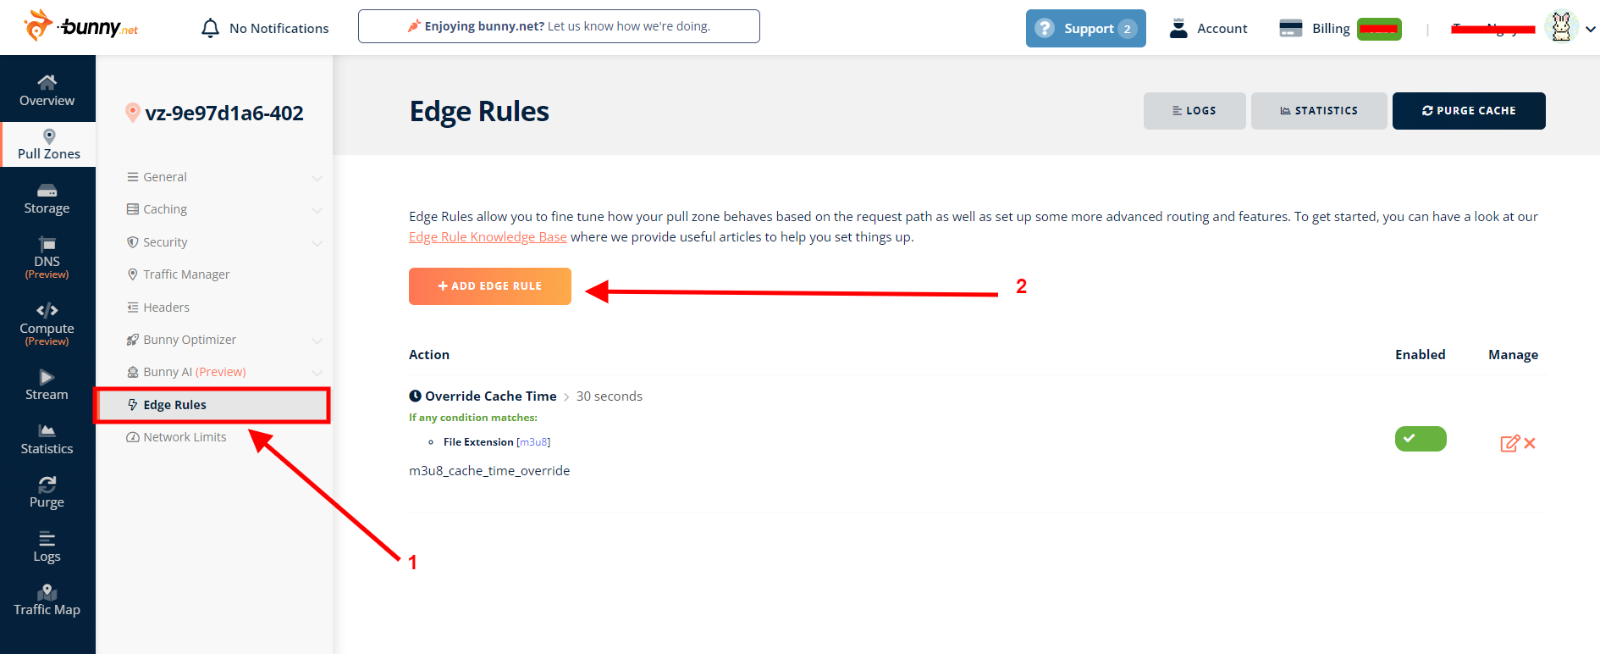
**Step 4**: click the **Edge Rules** and click the **ADD ADGE RULE** button.
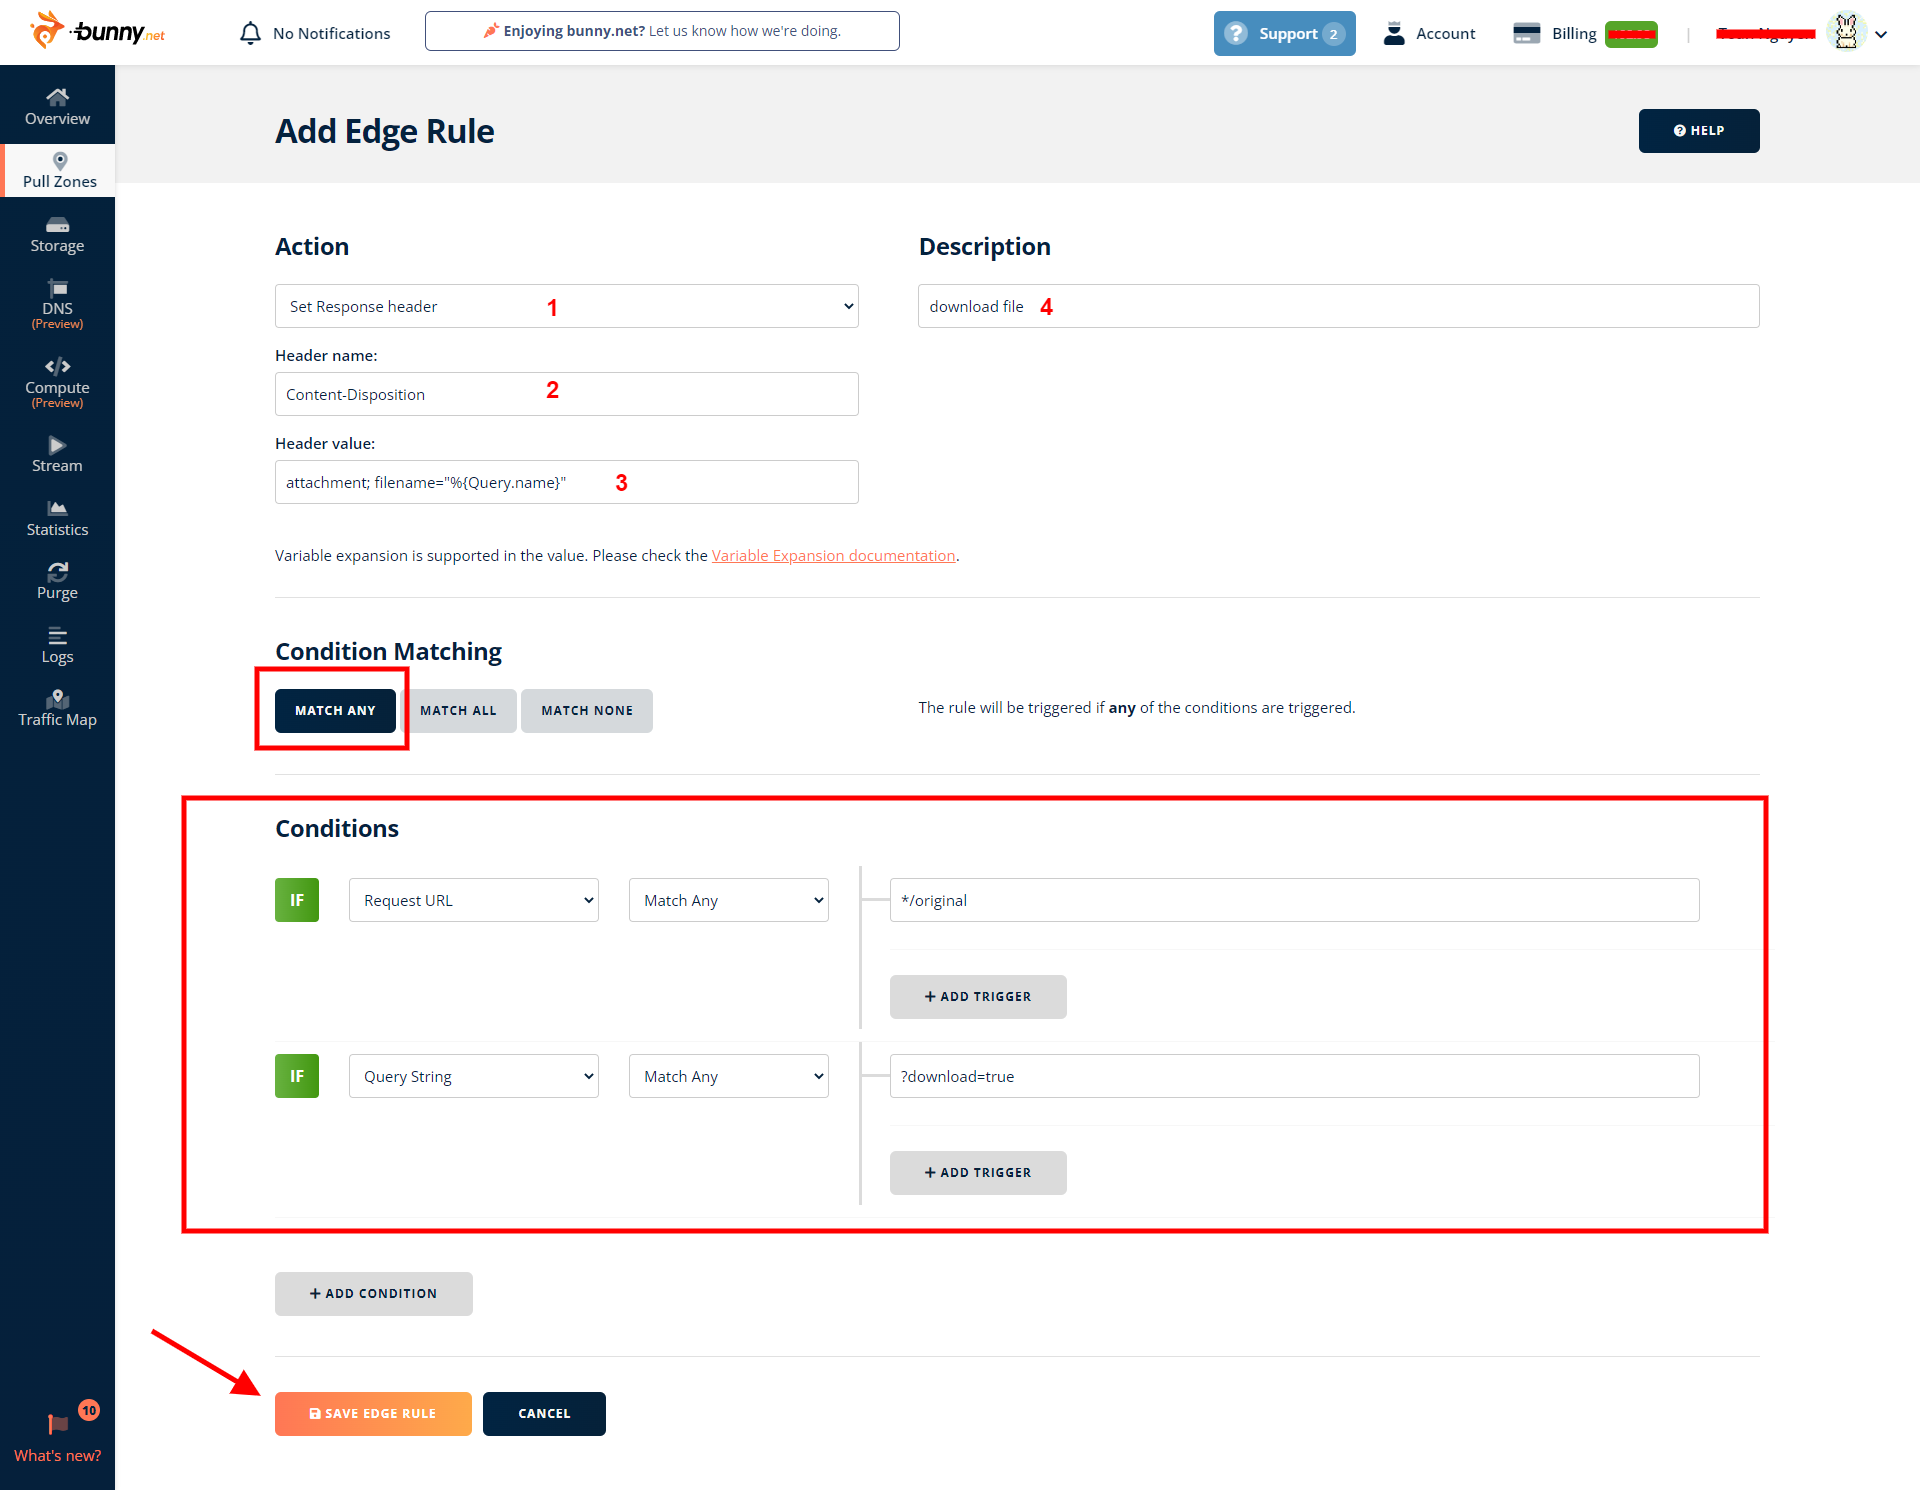
**Step 5**: Fill in all fields as shown in the following screenshot.
1. **(1)** Select **Set Response header**
2. **(2)** Enter **Content-Disposition** in the **Header Name** field
3. **(3)** Enter **attachment; filename="%{Query.name}"** in the **Header value** field
4. **(4)** Enter a description, for instance: download file
5. **(5)** Click the **MATCH ANY** button and add two condition fields as shown in the screenshot.
6. **(6)** Finally, click the **SAVE EDGE RULE** button
***
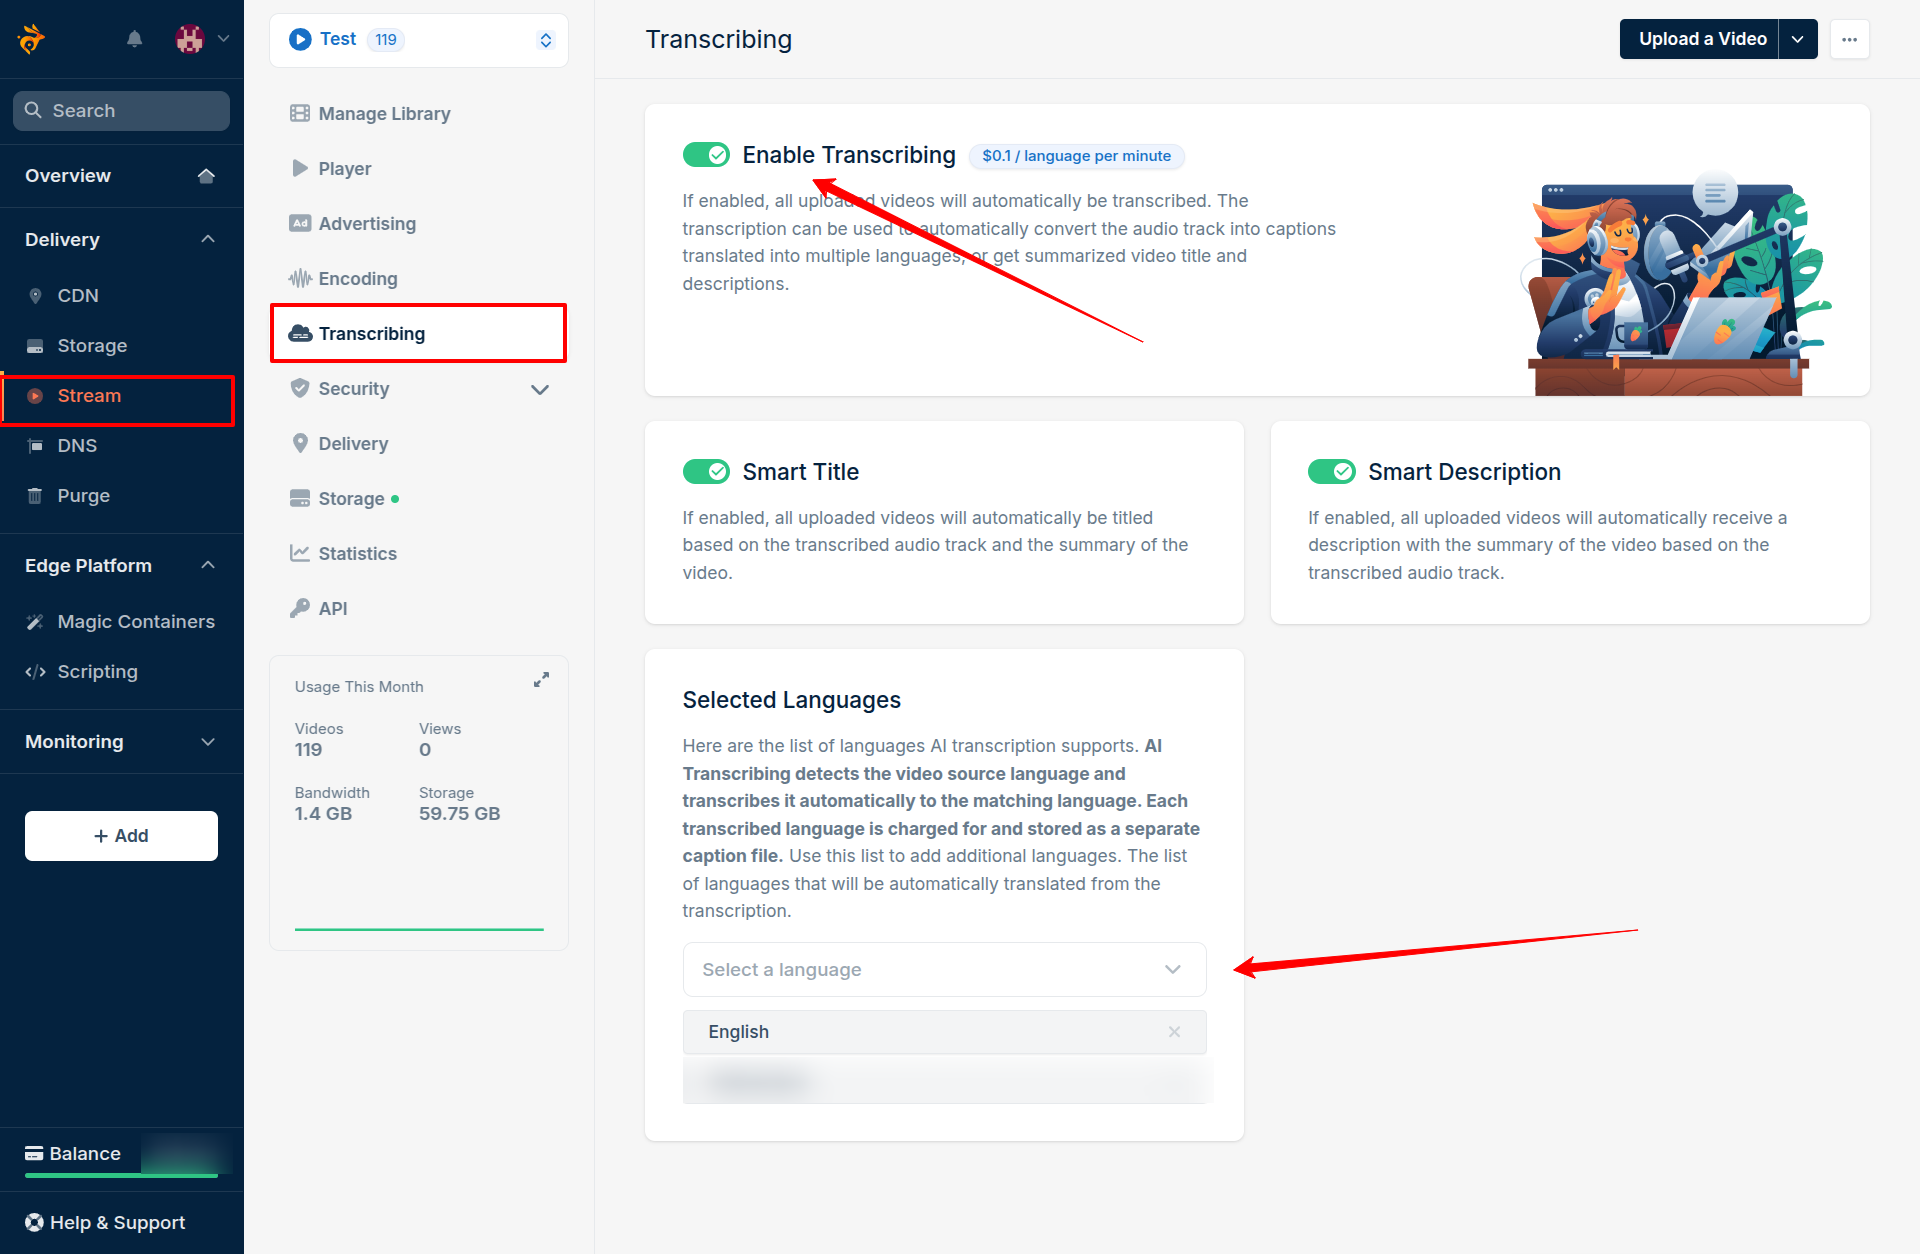
#### Enable AI Captions Generator
* Navigate to your Bunny Dashboard
* Select a Stream
* Go to the "**Transcribing**" section.
* Enable "**Enable Transcribing**" option
* Select the languages you want to generate captions for.
Consider the associated costs before enabling this option.
Enabling Transcribing only applies to newly uploaded videos.
***
#### Video Help Guides
{% embed url="" %}
{% embed url="" %}
{% embed url="" %}